|
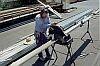
I really hadn't
planned to build my own roof trusses. After all, there are plenty of
truss-building companies around. But I soon learned that they only
build wood trusses, and that just wouldn't do. In my quest
for a supplier, I met and became friends with Gary, the owner of a wood
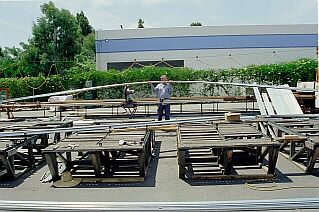
truss yard in nearby Oceanside. Gary granted me the use of his
facility to build my trusses. I packed up my cutoff saw and table
and spent most of the summer of 1997 there. |
|
|
One advantage steel has over wood is
availability in very long pieces. This and some careful planning
will minimize scrap. The material from which I built the trusses
came in 40-ft lengths. One piece weighs only about 65 pounds, but
it's very hard to turn while holding it. |
 |
|
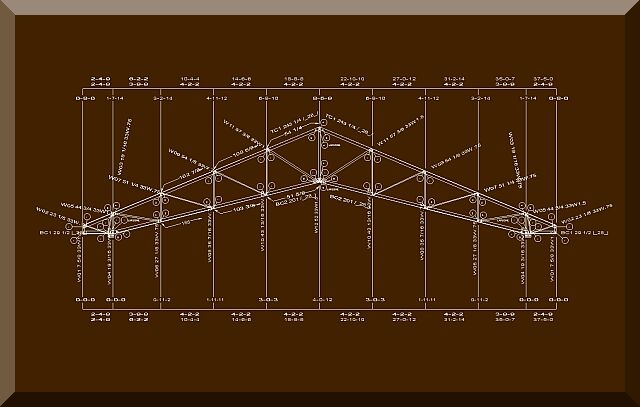
I would need a precise cut list to minimize
scrap, but first I had to design the trusses. I turned to DesignCAD,
which I use for almost everything, and prepared a dimensioned drawing for
each of the 128 trusses. These drawings were then given to Gary's
staff who ran the engineering and produced signed drawings for the county
building department to approve. |
 |
| I wrote a simple program to extract
the precise length of each element from the DesignCAD file and place them in an Excel
worksheet. The worksheet sorted by length and I had my cut list.
The cutting procedure was to cut the longest first and always try to find
a near-size remnant to cut from. After cutting was finished I had a
large pile of very short scraps and a few remaining full-length pieces.
The most difficult part was determining the length of the web
elements. I was never able to come up with a mathematical procedure
for this,
so each web was precisely sized by an iteration process.
|
 |
|
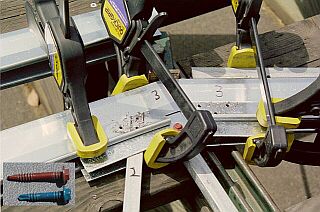
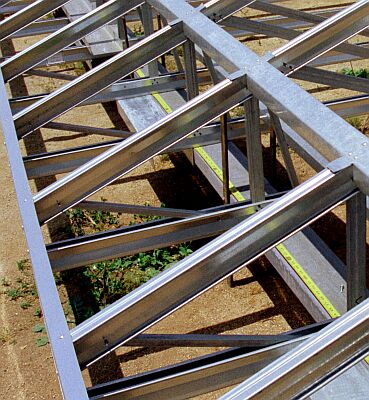
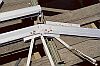
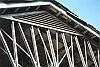
The joints between webs and chords are fastened
with blue double-shear self-drilling screws like shown in the inset.
When additional metal layers are involved, such as shown here for chord
joints, the longer red double-shear screws are used. But they often
break from the added torque. So I pre-drilled the holes for all the
red screws. |

|
|
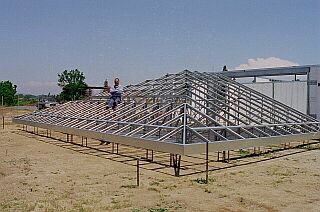
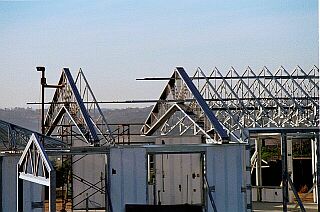
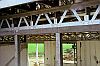
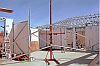
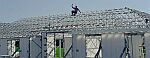
I build the garage trusses first and decided to
try setting them before building with the rest. I
was not yet accustomed to working at height, so I built a replica of the
garage top plate two feet off the ground and assembled the roof structure
on it. When finished I hired a crane to lift the assembly into
place. |
 |
|
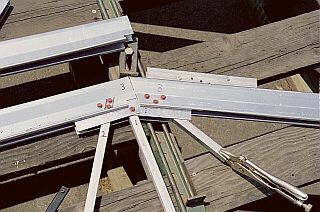
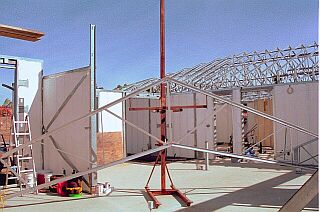
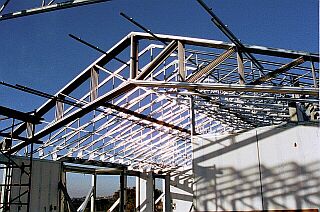
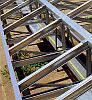
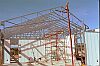
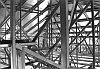
The steel top plate constitutes a serious
thermal bridge between inside and outside - not satisfactory for this
energy-efficient house. The solution was a change in the truss
profile.
Trusses for wood houses end at the outside edge of the plate.
Drooping rafter tails continue the roof structure beyond the wall to form
the overhang. The rafter tail usually passes only 3-1/2 inches above
the plate and the gap between roof sheathing and plate is filled with
pieces of 2X4 called Frieze blocks.
I changed the truss profile to be a structural cantilever beyond the
plate. This resulted in an 18" (instead of 3-1/2")
heel-stand above the plate in which full-depth insulation could be wrapped
around the plate into the soffit. This requires special bracing to
properly transfer lateral forces to the walls, as shown in this photo. |
|
 |
|
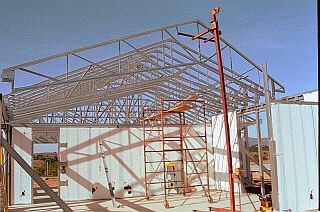
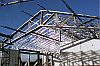
By the time the garage roof structure was
fastened in place I was less apprehensive about working at height. I
decided to set the trusses individually for the rest of the house and save
the crane fee. I
made a lifting fixture for my beam hoist to raise the trusses, diagonally
to the walls so they'd fit between them, then I'd rotate the hoist and
lower the truss into position. What was needed next was a trip up
the rolling scaffold to secure the truss against the braced line of
trusses already in place. |
|
|
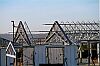
Eventually I approached the point of insufficient
clearance to raise the rotated truss. So I stacked the rest and
removed the hoist. These had to be manually finessed into position
moving each end a
few inches at a time. |
|
|
By Christmas, 1997, the roof structure was in
place. There were still a lot of fasteners and ridge caps yet to
install and, worst of all, the sheathing. |
 |
|
I suppose installing the sheathing was the
worst chore of the whole project. I'm astonished that I survived
it. To make it more challenging I laminated the underside of each
heavy sheet with aluminum radiant barrier material to keep the attic
temperatures lower.
One little feature that has been pleasing is this triangular gable
vent. I had it custom made, and it looks much nicer than the ugly
rectangular ones on other houses around here. |
|